Python Pt. 2 with a Dash of BashWelcome to LingHacks' second tutorial blog post! This week, we'll be covering some intermediate Python concepts that find frequent use in machine learning applications (or really, any large software application). Namely, we'll talk about (1) how to read (in) and write (out) various types of files, (2) how to collect and process user (in)put, (3) how to read and parse command-line arguments, and (4) how to handle (oops) errors that might come up in your code. Throughout the tutorial, we'll also be mixing in (5) some handy commands in the Bash scripting language that enable us to handle all these files and inputs. As usual, we'd love it if you could fill out our guest book for this post here to let us know that you've gone through this tutorial to some extent. As another update, we've revised our first post with COVID-19 resources here. If you're not familiar with basic Python, check out last week's blog post here for a refresher. That aside, let's get into it! Similarly to last week, feel free to use your favorite text editor offline, or if you don't have Python installed, open up a repl.it workspace by clicking here (and sign up/sign in to save your work if you wish). There are also some check-your-understanding quizzes sprinkled throughout--as always, they're just there for your edification and don't collect any personal information. File I/OOne key task found in many programming contexts is handling files. Files come in tons of different types and sizes, from PDFs of textbooks to PNGs of cats to code files to data sheets. When coding, you'll often want some information from a file that you'll have to read in, and you might also want to spit some information out into a file that you write out. That's why it's called I/O--I for reading in information, O for writing it out. On computers, files are organized into folders, which are fancily called directories in computer-speak. Depending on what type of machine you use, you may be familiar with "Desktop," "Downloads," "User," etc. All of these are names of directories, and they all contain files and perhaps other subdirectories (directories inside directories)! The concept of directories is also seen in Google Drive--there are folders that you can create, move, share, and more. We'll assume you know how to manually create, delete, and modify files on your local machine if you're using an offline editor for this tutorial. If you're using repl.it, here's the low-down on how to create files and directories on the site:
 The Bash BasicsIf you're using your own offline editor, open up Terminal (an app that should come with your machine). Terminal is basically an interface (fancy word is shell, or command-line interface) where you can enter a ton of commands (hence the name) to perform a ton of functions, from running code to writing code to organizing, creating, and deleting files. That last functionality is what we're going to focus on in this tutorial. If you're using repl.it, here's how to open up the shell:
With that, you should be good to go to start learning some commands in the Bash scripting language (the language used by the command-line interface). The first command we'll cover is ls, which stands for list. When you type ls and hit enter (which is the way to execute commands on the shell in general), you'll get a listing of all of the files and directories in the directory that you're in right now. This is basically everything you can "see" from the folder you're currently in. As an example, here's what I get when I type ls into my repl.it shell:  In the top level of my workspace, I have my main.py file (the default file that repl.it creates for you when you open up a new workspace), a file I created called anotherfile.py, and a directory I created called mydirectory. That's ls! The next command we'll cover is pwd, which stands for print working directory. Your working directory is the directory that you're in right now. When you first open up your shell, you'll be in your home directory by default (think My Drive or yourUsernameOnYourMachine). When you run pwd in your shell, it will print the absolute path to your current directory. Here's an example, with a full breakdown afterwards:  First, some terminology. A path is a specification of how to get to your current directory or a directory you want to get to. For example, in Google Drive, if you had a folder called "Poems" within a folder called "English" within a folder called "School", the path to "Poems" would be from the root directory would be My Drive -> School -> English -> Poems (that's the order of the folders that you click on). However, the path from My Drive would just be School -> English -> Poems, since you're already in My Drive. The path from School would just be English -> Poems. These last two paths are called relative paths because they depend on where you are right now. If you're in My Drive, you can only see the directories that are right in My Drive, and English is not one of them! So, if you were to take the path of just English -> Poems, that wouldn't make sense, since you can't see English from where you are! If you were in the English directory and you tried to take the path of School -> English -> Poems, that also wouldn't be possible, since you can't see the School directory from English! So, these paths are all relative to where you are right now. Contrast this with the first path from the root directory, which can be thought of as an absolute path. No matter where you are, you can always click on My Drive, from which you can go School -> English -> Poems. An absolute path, then, is a path specification that doesn't depend on where you are right now. It relies on the concept that no matter which directory you're in, you can always see the root directory, and you can always go down from there. In Bash (and in programming in general), we write paths with slashes to separate directories. For example, if you had a folder called "me" in a folder called "people" that was directly inside the root directory, your absolute path would be /people/me. The first / indicates that you're starting from the root directory. If you're in a directory and want to access a relative path, simply exclude the /. For example, the relative path to "me" from the root directory can just be written as people/me, since you can see "people" directly from "root". This path notation also extends to files. If I had a file called "yeet.txt" inside "me", the absolute path would be /people/me/yeet.txt (note: the path includes the extension, "txt"). So, the output in the screenshot above tells me that the root directory contains a directory called "home", which contains a directory called "runner", which contains a directory called "PythonBash", which is what I happened to name my workspace (by the way, you can change your workspace name by going to the upper left hand corner and clicking on where it says [yourUsername]/[randomlyGeneratedName]). This workspace is where I am right now! It's useful to run a quick pwd when you want to check where you are, what you can see, and what might be going wrong with your program if you're calling some files and they're not turning up. The third basic command is cd, which stands for "change directory." You type cd followed by the path to the directory you want to change, or go, into. This path is considered an argument to the cd command--basically the thing that the command is applied to (if unfamiliar, recall the "try a bite of pasta" vs. "try a bite of salad" analogy from "Functions" section of the previous blog post). Once you cd into that directory, you're "in" that new directory, so the files and directories you can now see are the ones that are visible from that directory. Here's an example of what happens when I cd into mydirectory:  As indicated by the text in blue, we're now no longer in PythonBash, but rather in mydirectory! Another piece of syntax to note here: the ~ is a shorthand in Bash for home. It's not the root directory, but it can be cd'ed into from any directory any number of levels below home. To be precise, here's the exact directory that repl.it considers home:  The naming is a bit confusing, but in this workspace, "runner" is considered the home directory. A final note about cd: when you try to change into a directory that can't be seen from your current directory, the shell will throw an error and say "No such file or directory." This will happen whenever you pass in some sort of file path that isn't valid relative to the current directory. Check your understanding of cd with the following quiz question! The answer and explanation will pop up once you click "Submit." So far, we've covered cd, ls, and pwd, which allow you to poke around in your file system and see what's there. The next few commands are for file creation and deletion. First up is touch, the command for file creation. When you type touch [filename], it creates a blank file with the specified name in the directory that you're currently in. Make sure you cd into the correct directory before touch-ing a file! The opposite of touch is rm, which is short for remove. It does what it sounds like it does--rm [someFile] removes a file by the specified name. Important: rm is not like Move to Trash--it deletes the file forever! Once you rm a file, you (basically) cannot get it back or take it out of the trash, so be very careful before rm-ing anything! From this point forward, it's also helpful to think of your Trash bin as more of a recycling bin--you can recover the contents for a certain amount of time. The real trash is rm, and you can basically think of it as a trash can that incinerates your files instantly, so you can't recover it. There are similar (but separate) commands for creating and deleting folders. To create a folder, the command is mkdir [someFolder]. That stands for make directory. To delete a folder, the command is rmdir [someFolder]. Again, rmdir is not like Move to Trash--an rmdir'ed folder is gone forever! Another note about rmdir: for safety, it only operates when your directory is empty. So, when you try to rmdir a directory that still has files or directories in it, it won't execute (this is probably a good thing). So, when you want to remove a whole folder, you're literally forced to go in and remove every individual file and subfolder to make sure you really want to get rid of the entire thing. Disclaimer: there are commands that force removal of entire full folders and subfolders, but they're not needed for this tutorial, and they're also very dangerous, so we're not going to cover them here. Just in case someone tries to pull an evil prank on you though, here's a link to some dangerous commands that you should not execute. Here's another link to an explainer. With that said, here are some examples of the touch, rm, mkdir, and rmdir commands in action: 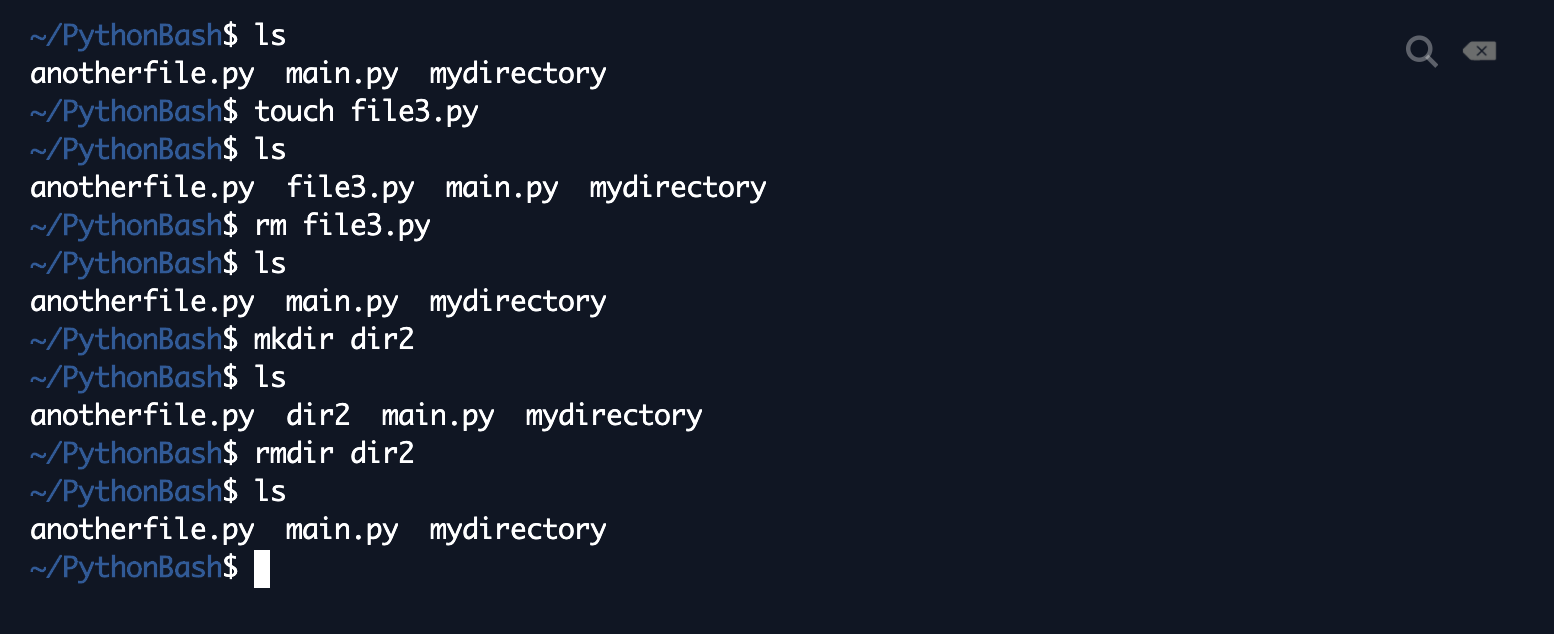 I type ls after every step to show how the contents of my directory have changed. First, I'm in PythonBash, and I have the directory mydirectory and the files anotherfile.py and main.py. Then, I create file3.py, and an ls shows that that's been added to the PythonBash directory. After that, I remove the file I just created, leaving the same contents as my original directory. A similar thing happens when I create dir2 and remove it. The last command that's essential for this tutorial is python3. It's not exactly a build-in Bash command, but it's important because it's the way you execute Python programs in the shell. python3 [yourFile.py] essentially executes the program in yourFile.py. It's the equivalent of pressing Run, but we can do much more with it, as we'll see in this tutorial. As an example, I wrote a program in main.py that just prints "Hello, world". Here's what happens when I run it in the shell:  Compare that with what you get when you hit "Run" (which, in repl.it, automatically executes whatever is in main.py). It should be the same! Those are all the commands that are needed for this tutorial, but just to be complete, we're going to talk about two more commands that are extremely common in Bash. First is mv, which stands for move. The syntax is mv [fileOrFolder] [whereYouWantItToGo]--the command basically moves a file from one directory to another (the equivalent of Move To in Google Drive. Similar to mv is cp, which stands for copy. It has the exact same syntax as mv, but the difference is that instead of moving the file, it makes a copy of the file in whereYouWantItToGo--so you end up with a copy of the file in both locations. Examples below: 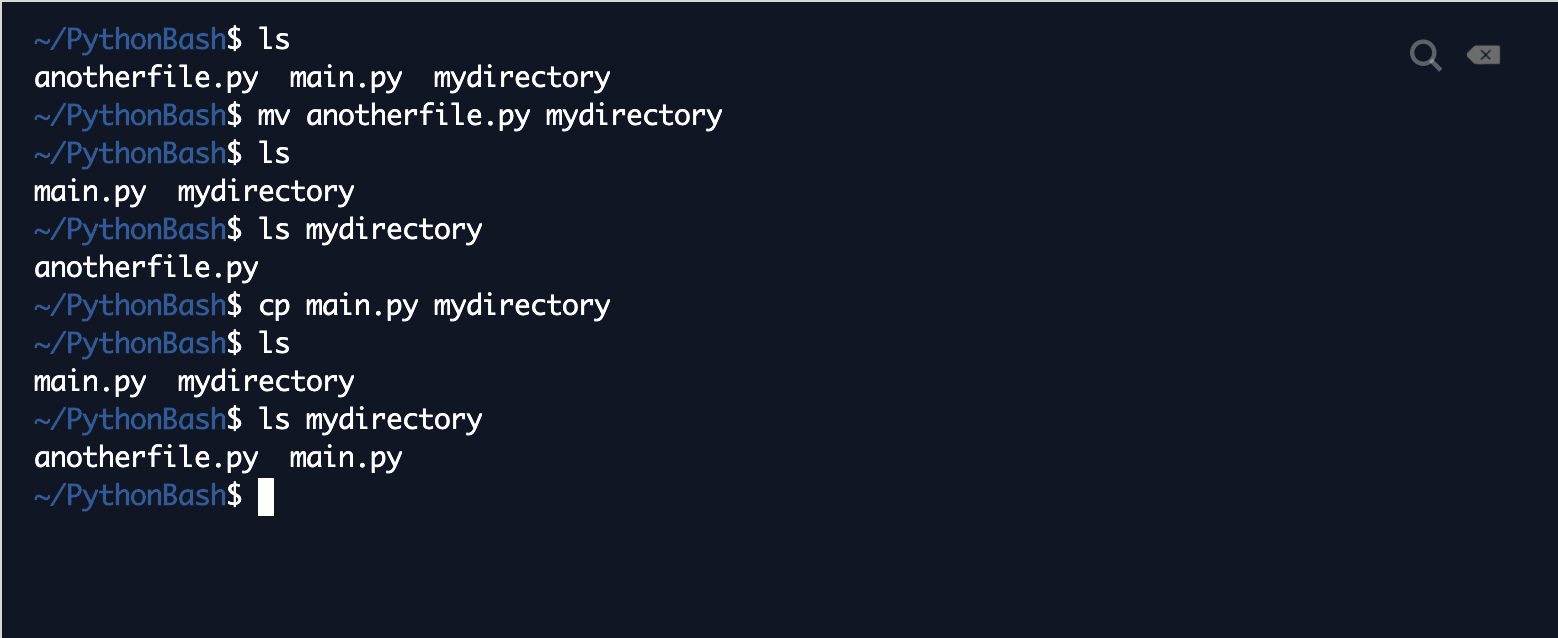 Per my first ls, I have anotherfile.py, main.py, and mydirectory in my PythonBash directory. Then, I move anotherfile.py into mydirectory. When I do another ls, anotherfile.py is gone from PythonBash! As seen in my next command, anotherfile.py has moved to mydirectory (note: ls [somePath] prints out all the files in directories that are in the directory specified by that path. There's a ton more ways to use ls, details here). Then, I make a copy of main.py in mydirectory. When I ls after that, you see that main.py is still in PythonBash, but there's also another copy of it in mydirectory! Those are all the essential Bash commands we'll cover today. Of course, this is just a cook's tour of the scripting language--there is so much more to Bash that we can't possibly cover in one post, but here's a link with more info and links to more Bash things. Onto Python! The Python: ReadingFor this part of the tutorial, we'll be working with generic .txt files (read "text files"), which just contain lines of text. First, let's create a sample text file that we'll use. You can do all of this manually, but just to practice our newly introduced Bash skills, execute "touch example.txt" in your shell, as in the example below:  Now, open up example.txt in your Files panel, and type in some random (> 1) lines of text. The example I'll use is below: 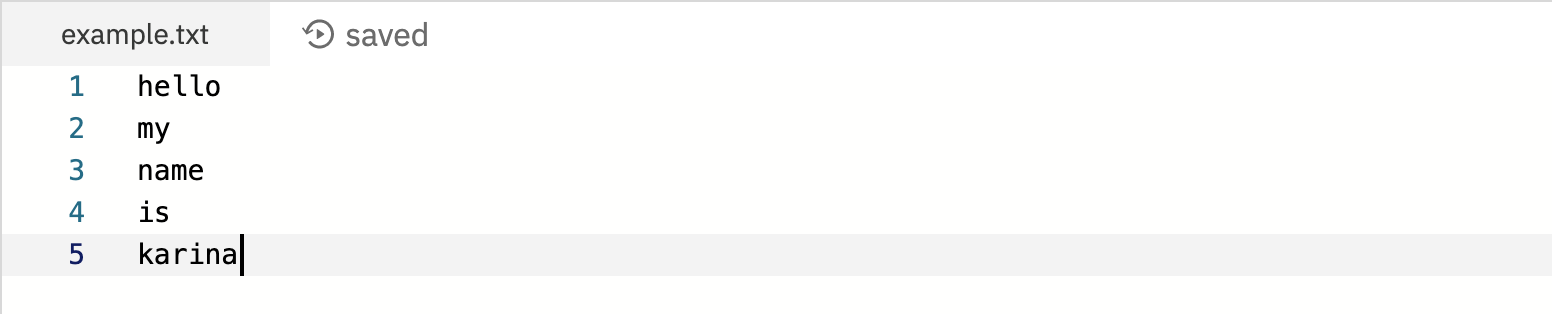 We're finally ready to write some Python! Open up main.py. The basic command to open a file in Python is...drumroll please...open. Very fitting! The syntax is open([filePath], "[mode]"). filePath is the (relative or absolute) path to the file you want to open, and the mode is a string with a few characters specifying whether you want to read the file, write it, modify it, etc. The "r" mode is the "read" mode, which means you can only read the information from the file, but you can't write anything in it or change it. To do things with the file, you'll want to save the result of the open() command to a variable, as below (type this, but don't run it yet): Now, the variable example contains the opened file "example.txt" in read-only mode. To actually read the file, the command is [fileVariableName].readlines(). Inside the parentheses, you can optionally specify the number of lines you want to read, but by default, it reads all the lines if you say nothing. Continuing our example, type the following (but still, don't run it yet): The first line reads the lines from the example file and saves them in a variable called lines. The second line is for our information--type(variable) tells us the data type of the variable in question. In this case, readlines() returns a list of all the lines, each of which is a string. Printing the type of a variable is a useful debugging tool if you want to see whether your code is failing because you're trying to apply some function on a variable of the wrong type. Finally, we can print the lines of the file by calling print(lines). Before we run this, we need one more line to make sure our computers don't explode: This does what it sounds like it does: it closes the file. If you don't close the file, all kinds of messy stuff might happen with your computer's memory--a full explanation would get into all the inner working of computer memory, which are not the focus of this tutorial, but just remember to close any files you open. Now, we're ready to run all of this code! You can totally just press Run on repl.it, but again, I'm going to practice our newly introduced Bash skills. Here's what happens when I run my example code:  As we can see here, readlines() gives us a list object. Each line is its own string element in the list, and the file reader also stores line breaks as newline (\n) characters. Now that we have all the file information in a list, we can do whatever we want with the information by just operating on lines as we do on any list, so that's it for file reading! The Python: WritingOther than reading files, we might also want to create them! In Python (and in general computer land), this is known as writing files. As with reading, you'll first want to open the file with open([fileName], "w"). The "w" stands for write, indicating that you'll be writing to this file and not reading it. You can name the file whatever you want, since you're creating it! Then, the command to write something to the file is [yourFile].write("[whatYouWantToWrite]"). Try the following code in main.py (just paste it below where you left off): Here, we introduce another piece of syntax, which is the with command. The above code is essentially equivalent to the following, but it's just much cleaner, and it takes care of closing the file for you once you exit the indented block: Run either one and see what happens! Here's what I get when I open up "written.txt" after running the code above:  The takeaway here is that .write() writes exactly what you tell it to, no more and no less! If you want these two words to be separated by a newline, you need to say that! Having separate write() commands won't do the trick for you. Modify the code as follows and rerun: Here's the output of written.txt now--much better!  There's just one small problem here--this code worked for our purpose, but what if we had a file already and wanted to add onto it or change it? Opening an existing file in "w" mode essentially deletes what's already there and re-creates the file, so it overwrites the previous version of the file. To add onto a file, we have to open it in "a", or append mode. See it in action by running the code below: Code Editor
Here's the resulting file:  As you can see, we've appended "more" and "words" onto our existing file. Just to drive this point home, change that "a" to a "w" in the code above to see what happens. Here's what I get:  From this example, we see that even if you create a file and open it with "w" mode twice in the same program, the whole file gets rewritten every time you call a new open()! So, be sure to use "a" mode when you want to modify a file, and when you want to write separate new files, make sure to name them differently! We can easily extend the functionality of write() to write entire lists (or any iterable object) to files. Simply use a for loop! Example below: Code Editor
Here's the output: 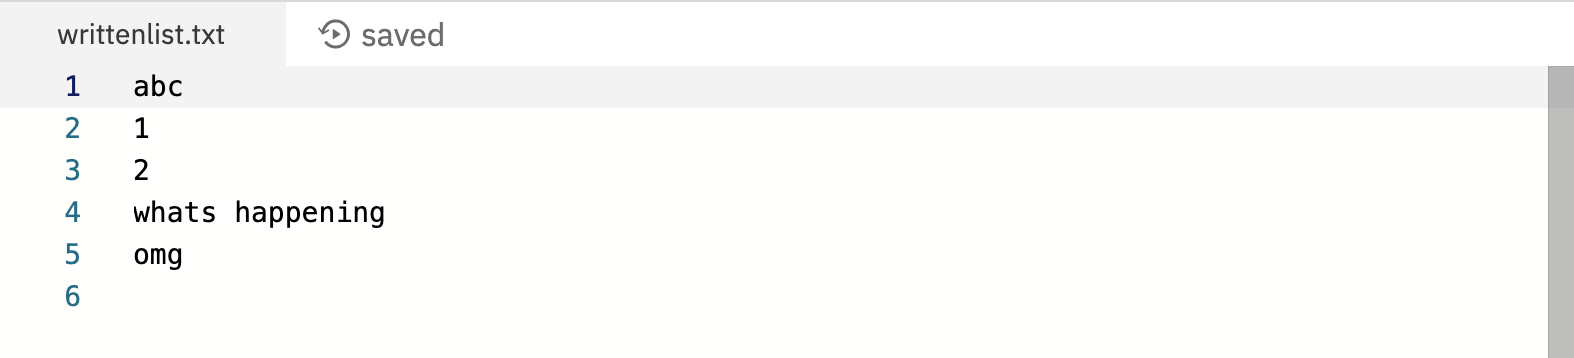 What we've done here is iterate through each element in our toylist, cast it as a string, concatenate it to a newline character to make sure we're getting our line breaks, and write it to writtenlist.txt. One last note: notice how we don't have any problems when we use outfile as our file variable for every single one of these with _ as _ statements. This is because the variable name outfile only has scope (basically, can only be seen) within the indented block of the with _ statement. Once we exit the statement, outfile has no meaning, and it can be reused however we want. That's it for basic text files in Python! Again, we by no means claim to cover everything there is to know about file I/O, but this should be a decent overview of the fundamentals that are useful in data science, machine learning, and computational linguistics. Now, we'll introduce a couple of special file types that are often dealt with in data analysis. Special Files: JSONJSON stands for JavaScript Object Notation, and it's a useful tool and file type to store data that comes in the form of dictionaries. It was invented based on the JavaScript programming language, but the core idea of it is so powerful that it's been extended to several other languages, including Python. In fact, it's extremely useful not just for dictionaries, but for any data whose structure (lists, dictionaries, etc) that you want to preserve as more than plain text. It might be somewhat easier to introduce JSON file I/O by writing a file first. To do this, we'll start by importing Python's json package (the package that contains all this fun functionality allowing us to process JSON files) and creating a sample dictionary. If you're not familiar with dictionaries, we have a section on it in our previous blog post. Feel free to just add onto main.py, but to practice working with multiple files and Bash commands and separating code for different tasks, I'll do the demo with a new file called jsonpractice.py. You can create this file by entering touch jsonpractice.py in your shell. Code Editor
From here, let's say we want to dump all this information in a file. One way to do it would be to cast toydictionary as a string and write it to a text file, but what if we wanted to load it up again sometime in the future and access it as a dictionary? Converting strings to dictionaries is really complicated to do manually (it gets even more complicated if we have large amounts of code that might be in different programming languages), so that's where json comes in! In anticipation of this future need, we're going to write our dictionary to a json file instead. The command for this is json.dump([dataName], [fileObject]) (source here). Add the code below to jsonpractice.py and run it using python3 jsonpractice.py in your shell: Code Editor
Here's what I get:  Essentially, we've copied the entire data structure and written it into a file. We can also write the data to "toydictionary.txt", but as you'll see if you do that, plain text isn't as colorful as json--it's easier to see the keys, values, and different data types when you tell the computer to specifically interpret your file as a JSON object. Now, let's read some data! The command for this is json.load([fileObject]). Code Editor
Essentially, json.load() turns a JSON file into a dictionary object, which you can then call and manipulate just like any other dictionary! Pretty magical! Here's the output when I run this code:  As expected, we see that toydictionaryrecovered is of type "dict" (dictionary). When we call its "name" and "age" keys, it returns the correct values! JSON can be used to load lists of dictionaries, dictionaries of lists, lists of dictionaries and lists, and much more! The beauty is that it magically interprets the data structure for you so that you can call operations on it without worrying about converting back and forth. Here's an example with a list, of which one element is a dictionary: Code Editor
Here's the resulting file:  And here's the shell output: 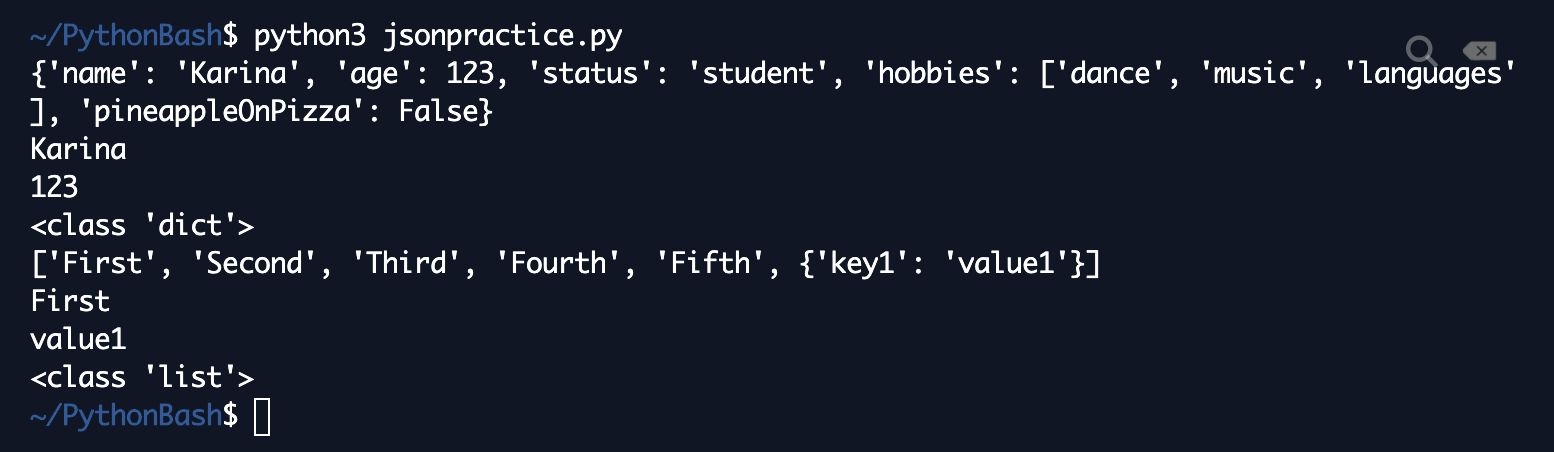 As expected, JSON interprets our toystructurerecovered as a list, and it interprets the last element as a dictionary, as shown by the fact that it can correctly print out the value of "key1" in the lists's last element. That's it for the basics of JSON! You'll find JSON useful when you're dealing with data that comes in a variety of different formats, including API dumps, news article dumps, and various other types of information. Special Files: CSVAnother common file type in data analysis is the CSV, which stands for comma-separated values. This is what it sounds like--each line has a bunch of values, and they're separated by commas. Let's create a sample CSV. First, run touch example.csv in your shell to create an example.csv file:  Then, open up example.csv, and enter some data that's separated by commas. Here's an example:  Unless you do some fancy manual processing, make sure to not include any extra spaces in your data. In practice, you'll often be converting different forms of data into CSV format or downloading a Google Sheet in CSV format, and most of these conversion programs do the comma separation for you, but we're just showing you how a properly formatted CSV should look like without any fancy display tools. Now, since CSV's are so special and common, Python has its own package to handle them as well! It's called...csv. Fitting, yes. We'll want to start by importing that package. To practice these Bash skills, I'm going to do all of this on a new file called csvpractice.py. To read a CSV, we'll first want to open() the file in "r" mode as before. Then, we'll use the csv.reader([fileObject]) command to read it. Example code below: Here's what happens when it's run:  Notice that lines is not a list! When we use CSV, we'll have to do one extra step--cast the reader object as a list. Modify the above code as follows: Here's the shell output:  As shown here, CSV interprets each line of the file as its own list, and it separates the elements correctly by comma. We end up getting a list of lists! Now, let's write a CSV! In this toy example, we'll just regurgitate what we read from the file originally. The object we use here is the csv.writer, and the command to write a list as a line of a file is writerow. Here's the code: And here's what regurgitated.csv looks like - the CSV formatting is done automatically!  There are fancier packages with which to read and manipulate CSV files that we'll cover in the next few posts, but this is it for the basics for now--once you've loaded a CSV into a list, you can mess with it as you mess with lists! User InputThe next topic for this tutorial is user input, which is key to making your programs interactive. User input is what it sounds like--getting input from the user of your program. The command for getting user input in Python is...input. We love intuitive function names! More specifically, the syntax is input("[message]") if you want to display a message, or prompt, so the user knows what to actually input. Here's an example asking a user for their name and then printing out a greeting (inspiration from here)--I'll switch back to main.py for this section: Code Editor
What this code does is display the message "What's your name?" with a newline, wait for the user to enter their name, and print the greeting, customized for them. Here's an example of the output:  Now, name is just a string (by default, all input is collected in string form). You can manipulate it just like you manipulate any string! What To Do When Things Go Wrong: Error HandlingTheoretically, you can control your own code so that nothing goes wrong. However, when you're passing in external files or taking in user input, things get a lot riskier, as you can't always control the input. To anticipate these types of situations, you'll want to do some error handling--again, literally what it sounds like--handling errors (fancy computer word for "when stuff goes wrong"). As a disclaimer, you can only handle run-time errors, which are errors that happen while your code is running (better explanation here). There are some errors like syntax errors (computer equivalent of grammar errors) that can't be handled because your program simply won't run when there are these errors. Here's an analogy: let's say I tell you to "open the ground." This is grammatically correct--you're applying an object to a verb. However, it doesn't make sense because usually, you can't just crack open a slab of concrete. At least, chances are that the ground beneath you can't just be opened without drastic financial and legal consequences. This is kind of like a run-time error because it's linguistically sound and theoretically doable, but when you actually try to go do it, something will go majorly wrong. Now, suppose I tell you to "akdsuhfake the asuhfdaj" or to "notebook speak the." In the first case, two of the three words aren't even English words, and in the second case, "notebook" isn't a verb, "speak" isn't a noun, and "the" is in the wrong place. You basically can't even begin to decipher what I mean because these commands aren't linguistically sound! These are more like syntax errors because you can't even execute on these commands in theory. In Python, syntax errors are like forgetting to indent something, forgetting to put a colon somewhere, having one more opening parentheses than closing, etc. The computer simply can't interpret your code if you do that. Runtime errors are things like dividing by zero, input being in an unexpected format, etc--you don't know that these things have gone wrong until you've actually run the code. In other programming languages, syntax errors belong to a broader class of compile-time errors (basically things that go wrong that prevent you from even running your code, precise explanation here), but Python isn't a compiled language, so that concept doesn't really apply here. Disclaimer aside: we have ways to anticipate potential errors in Python! The fundamental strategy is to use try and except. You basically try to do something, and if something goes wrong, you execute a Plan B by excepting that error and responding in some form. Here's the syntax with an example (also just in main.py): Code Editor
Here, we're saying, let's try to divide three by zero. If we can do that, then let's print out a message indicating success. If we can't, we'd ordinarily just crash the program (try running x = 3 / 0 by itself to see what happens!), but in this case, we're going to catch that mistake and print a different message instead. This code will print "Can't divide by zero". Here's another example, where things might go awry with user input. Read through the code and check your understanding with the little quiz below! The answer and an explanation will pop up once you submit the quiz. Code Editor
Command-Line ArgumentsOur last topic for this tutorial is command-line arguments, which are basically like function arguments, but the functions are command-line commands. You've actually already seen some of these! For example, when you run a file with python3 [yourfile.py], yourfile.py is a command-line argument to the python3 command because it's the thing that the python3 command is being applied to! In the shell, arguments are separated by spaces (for example, mv myFile somewhereElse), so when you want to actually type a space (try to avoid it, but if you must), you need to precede it with a \ first. We can also integrate command-line arguments into Python programs! Below, we describe two ways in which we can do this. For Level 1, I'm going to make a new file called cla.py. How to Write Them: Level 1The package that handles command-line arguments is called sys (stands for system). We're going to start by importing this package. Code Editor
The object that accesses the command-line arguments is a list called sys.argv. Let's start with a basic example: Code Editor
After you type this code, run python3 cla.py. Here's the output:  This shows what sys.argv stores: a list of the command-line arguments. The first command-line argument is, well, the name of the file we're running! Now, let's add some more arguments in a more complex program. Don't run it just yet. Code Editor
Here, we basically want to take in two additional command-line arguments and compute their sum (it's kind of a form of user input, if the user wants to use Bash). An important thing to note here is that the elements of sys.argv are strings by default, so we need to cast them as integers or as whatever data type we need them to be (clearly lots of room for error handling here). In the next section, we'll run this program with some example arguments. How to Run Them: Level 1Recall that command-line arguments are separated by space. So, to run this program, simply run: python3 cla.py [first number] [second number]. Example run below:  Works as expected! Now, you can get by with sys.argv for most things. For simple programs, it works just fine. However, there's a lot of room for error, and there's a lot to keep track of. For example, things will go wrong if you enter your arguments in the wrong order, miss one argument, or maybe have too many arguments. You also have to keep track of which index every argument is at, which can get frustrating if your code becomes too complicated or if you're working with multiple people in multiple iterations. Nothing here is fatally wrong with sys.argv, but it just seems really stressful. Below, we'll introduce another command-line argument handling system that relieves some of this headache. I'm going to start another file called cla2.py for this section. How to Write Them: Level 2Python has another wonderful package called argparse, which stands for argument parser. Parsing is computer-speak for deciphering code (computer equivalent of figuring out what somebody's saying). We'll start by importing this package and creating an instance (kind of like a copy) of the parser (source: I'm getting most of this code from here). Code Editor
The instantiation takes in an argument called description, which can be set to a string that describes what your parser does. Now, for all the arguments we want to keep track of, we're going to use the parser.add_argument function to do so. Examples below, with explanations to follow: Code Editor
The add_argument function takes in several arguments. The first argument is the name of the argument--so unlike with sys.argv where you can only access arguments by their indices, you can actually keep track of arguments here much more intuitively! The name is just a string that's whatever name you want your argument to be. The -- in front of the name specifies that the argument is optional (i.e. it doesn't have to be entered by the user, but it also totally can). So, number1 is required, but number2 is not. The next argument is metavar, which is basically a nickname or a name that you want to show to users. When a user runs a program and asks for help, the help message will display the name of the argument as its metavar (more on that below). Next, we have the type, which decrees the data type that we want our argument to be. In this case, we'd like to have an integer. This gets rid of the need to cast string arguments as different types! After that, we have a help argument, which is a string that is a message that gets displayed when the user running the program asks for help (more on how to do that below). Finally, a pretty common optional argument is default, which specifies what the value of the argument should default to if the user doesn't enter it (for programs that have some non-critical arguments, this saves the hassle of having to have the exact number of arguments that sys.argv would look for). There are also several other arguments that add_argument optionally takes in (full documentation here), but these are the most important ones for now. Now that we've added our arguments, we're going to parse them. This is just syntax to remember--parser.parse_args() basically feeds the parser's arguments into a parsing machine and gets them ready for other things to be done to them. Let's do some stuff with these arguments! We're going to build an adder--given number1 and number2, we want to print out their sum. If number2 isn't specified, we'll assume it's 0, as per our default value (we couldn't do this directly with sys.argv without try/except, but this is much cleaner). Copy the code below, but don't run it just yet. Code Editor
How to Run Them: Level 2Running programs using argparse requires a bit more fancy jargon, so we're here to break it down. The general rule for running a program using argparse is to flag the optional arguments and not flag the required ones. Normally, the convention is to type python3 [yourFile.py], followed by all the required arguments, followed by all the optional arguments. It also works if you type all the optional arguments followed by the required arguments, but it's usually easier on the head if you do it the other way around. Here's an example:  As expected, this program returns the sum of 5 and 4. This is what we mean by flagging optional arguments. To let the program know that we're including the optional argument, we need to precede it with --number2 to let it know it's coming. python3 cla2.py 5 4 wouldn't work! On the other hand, we don't flag the 5 that is number1--flagging it would cause an error! Here's how it works in the other order:  We get the exact same thing! Now, here's what happens when we just don't include a number2:  number2 defaults to 0, so when we don't specify it, the program just returns number1 + 0, which is just number1! Finally, if you (or some other user of your program) forget how to run your program, this is where argparse can save your life. Run python3 [yourfile.py] --help. 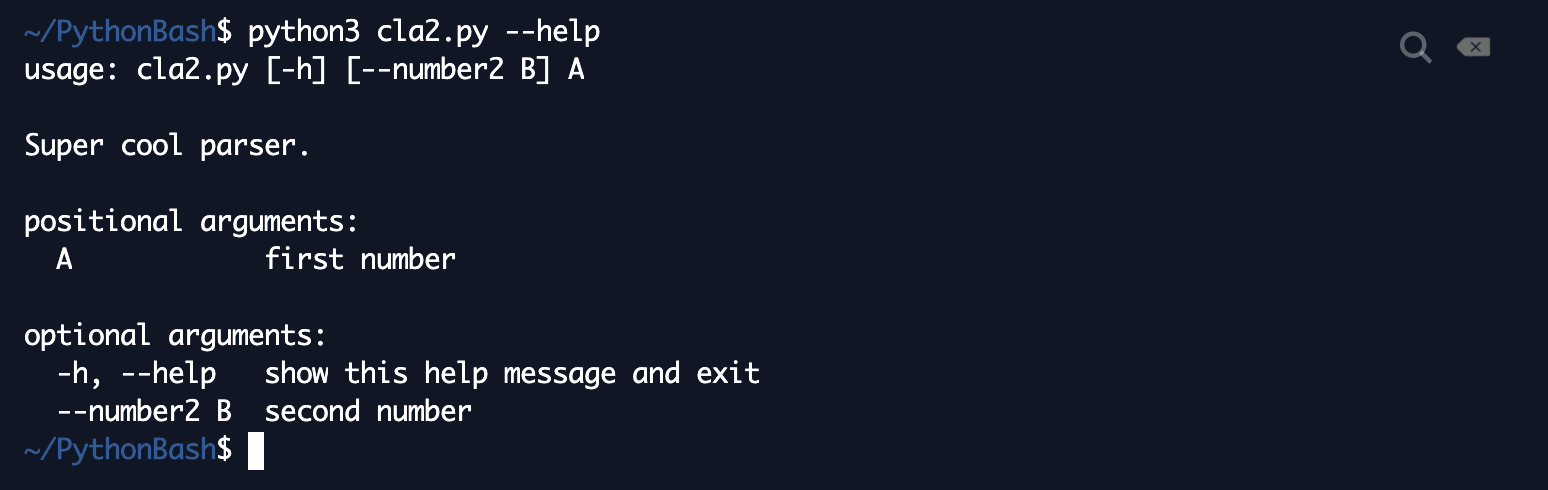 This is where the help arguments that we specified in our program come in handy! This --help method prints out a super helpful message with instructions on how to use your program (i.e. how to input and flag arguments), which arguments are required, and which arguments are not required. It can definitely be super extra to use argparse for simple programs like adding two numbers, but with a lot of machine learning papers and software that is generally more complex than our toy examples, these extra functionalities in argparse become extremely helpful. You'll see them everywhere in publications and software releases! Wrap-UpThanks for making it to the end of this tutorial! We hope you found this post helpful. To recap, we've covered:
All of the code from this post can be found in one place here. Up next, we'll cover some powerful packages that can process, analyze, and manipulate data in Python. If you've made it this far, we'd really appreciate it if you could take a moment to fill out our guest book here to let us know that you've read this post and give us any feedback (as always, the form is totally anonymous, and all questions are optional). To be the first to know when more content comes out, subscribe to our newsletter here. We're also constantly updating our post from May 15th with new resources, and we've just added some resources for education and action here. Finally, all of our blog posts can be found here. Thanks for reading!
29 Comments
9/5/2022 07:37:31 am
Really informative article, I had the opportunity to learn a lot, thank you. https://freecodezilla.net/perfex-crm-nulled-free-download/ 9/11/2022 05:16:47 pm
Really informative article, I had the opportunity to learn a lot, thank you. https://kurma.website/ 9/12/2022 03:25:05 am
Really informative article, I had the opportunity to learn a lot, thank you. https://odemebozdurma.com/ 9/30/2022 05:47:08 am
It's great to have this type of content. Good luck with your spirit. Thank you. https://bit.ly/site-kurma 10/4/2022 04:11:56 pm
I think this post is useful for people. It has been very useful for me. Looking forward to the next one, thank you. https://escortnova.com/escort-ilanlari/nevsehir-escort/hacibektas-escort/ 10/5/2022 02:19:40 am
It was a post that I found very successful. Good luck to you. https://escortnova.com/escort-ilanlari/kilis-escort/ 10/6/2022 01:16:02 am
I follow your posts closely. I can find it thanks to your reliable share. Thank you. https://escortnova.com/escort-ilanlari/mugla-escort/ula-escort/ 10/6/2022 06:26:25 am
I support your continuation of your posts. I will be happy as new posts come. Thank you. https://escortnova.com/escort-ilanlari/izmir-escort/foca-escort/ 10/7/2022 03:18:43 am
I think the content is at a successful level. It adds enough information. Thank you. https://escortnova.com/escort-ilanlari/kocaeli-escort/kandira-escort/ 10/7/2022 07:09:18 pm
Thank you for your sharing. I must say that I am successful in your content. https://escortnova.com/escort-ilanlari/amasya-escort/gumushacikoy-escort/ 10/8/2022 06:47:35 am
Thoughtful and real content is shared. Thank you for these shares. https://escortnova.com/escort-ilanlari/erzurum-escort/uzundere-escort/ 11/21/2022 04:27:48 pm
Tıkla evde calismaya basla: https://sites.google.com/view/evden-ek-is/ 12/9/2022 03:48:04 pm
Düşmeyen bot takipçi satın al: https://takipcialdim.com/ 12/9/2022 06:51:40 pm
Garantili Tiktok takipçi satın al: https://takipcialdim.com/tiktok-takipci-satin-al/ 12/9/2022 06:54:42 pm
instagram beğeni satın al: https://takipcialdim.com/instagram-begeni-satin-al/ 12/15/2022 02:25:36 pm
takipçi satın al ve sitemizi ziyaret et: https://takipcim.com.tr/ 2/10/2023 09:37:26 pm
its Really helpful content for me, thanks for sharing such a beautiful psot... 4/27/2023 11:40:55 pm
Steroid Satın Al: https://www.anabolickapinda14.com/urun/ Leave a Reply. |
LingHacksNote: as of June 2022, this blog (and the rest of the LingHacks site) has moved to http://linghacks.tech. This is where we post cool content about computational linguistics & machine learning as well as exciting announcements about our programs and partner programs! Archives
January 2022
Categories |
 RSS Feed
